Supplies: Psp, Black & White Flower template HERE, Font of your choice, Plugin Eye Candy 4 HERE.
1.Open your flower in psp [duplicate and close original]
2.Promote the background to layer.
3.Active your magic Wand tool:
![]()
4.Select the white background and hit delete in your keyboard.
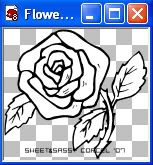
5.Deselect.
6.Active again your magic Wand tool and select inside the leaves.
7.Fill this with a green color #0B611D.
8.Now go to: Effects/PlugIns/EyeCandy4/Glass with this settings: glass color [the same color you use for fill]
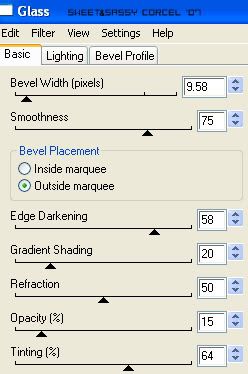
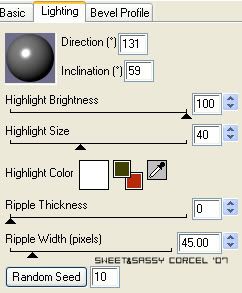
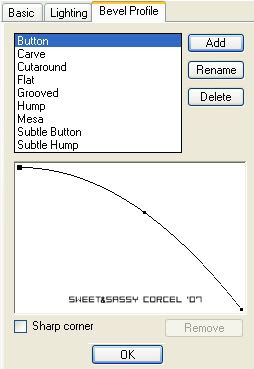
9.Hit ok and deselect.
10.Now select the stem of the flower, fill with color #533E15.
11.Go to: Effects/PlugIns/EyeCandy4/Glass with the same settings before [glass color the same you use for fill].
12.Hit ok and deselect.
13.Now select the petals of the flower.
14.Promote the selection to layer.
15.You can fill all the petals with the same color or using diferent shades.
16.Apply the same Eye candy 4/Glass effect to the petals [glass color the same you use for fill]
17.Merge visible all your layers.
18.Resize the flower as you like.
19.Add a shadow, go to Effects/3D Effects/Drop Shadow with this settings:
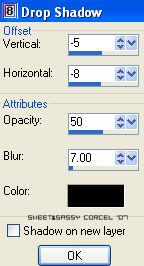
20.Add your text with a nice font.
21.Don't forget your watermark.
22.Finally Crop the excess of your image and Flatten all.
23.Save your work.
Them Done!, thanks and I hope you've enjoyed! Tutorial write on April. 21 '07 by AngieCorcel. This tutorial is my own creativity, any resemblance to any other is purely coincidentaly.
-------------------------------------------------


