

Supplies: PSP, Zipper ©Sherrie, CremeCircle Frame by me from HERE, Papers and embellishments from ©Sentimental Style, Mask Montiblindsmask1 HERE or use my maskglitter animation HERE, Font A&S Snapper, Tube of your choice. I use artwork from ©David Boller.
Download my supplies HERE.
1.Open a new canvas 600x600 transparent in PSP.
2.Open all the elements you will use in psp.
3.Copy the Creme Circle Frame and paste as new layer in your canvas.
4.If you use the same colors than me, colorize the frame, go to Adjust/Hue and Saturation/Colorize, H 78, S 71.
5.Active your magic wand tool and click inside the circle frame.
6.Go to Selections/Modify/Expand 10 pixels.
7.Add a new layer.
8.Copy one paper and back to your canvas and paste into selection.
9.Do not Deselect. Add a new layer.
10.Copy another paper and back to your canvas and paste into selection.
11.Now Deselect.
12.Arrange this two paper layers to bottom.
13.Copy the Zipper and paste as new layer, arrange this down to the Circle frame layer.
14.Resize the Zipper 75%.
15.Delete the extra of the zipper out of the circle.
16.Now active the Freehand Selection tool and draw selection around the top of the zipper.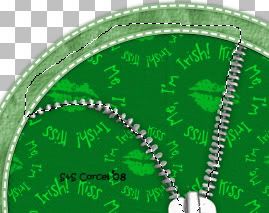
17.Go to Selections/Invert.
18.Step in the first paper layer, hit delete in your keyboard.
18.Step in the first paper layer, hit delete in your keyboard.
 19.Now copy the embellishments and proceed to decorate your tag.
20.Finally add your tube and the ©info, add your watermark.
21.In a new layer add the mask, arrange this to bottom.
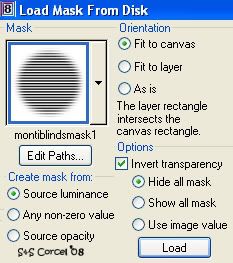 22.If you want to add the same noise effect, just copy the mask layer and paste this as new animation in the Animation Shop program.
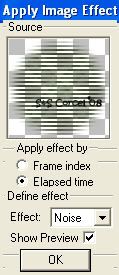
23.Duplicate this image 3 times, and go to Effects/Apply Image Effects/Noise/Elapsed Time.
 24.Or simply use my previous mask animated, open in your Animation program, then copy merged your final tag and propagate paste over the animated frames.
25.Save your tag and enjoy your results.
 Them Done!, thanks and I hope you've enjoyed! Tutorial write on March. 8 '08 by AngieCorcel. This tutorial is my own creativity, any resemblance to any other is purely coincidentally.
---------------------------------------------------


