

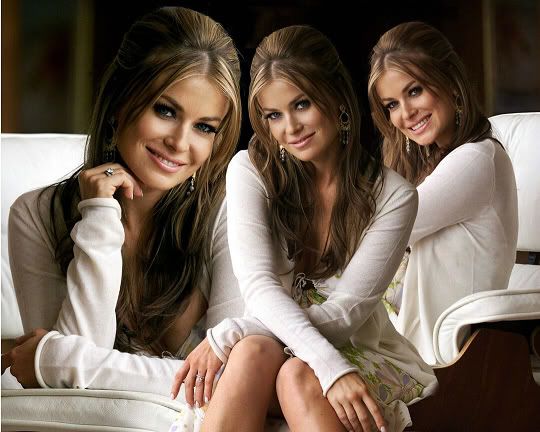
 Supplies: Psp, Image Blend of Carmen Electra, Picture Frame Edge dots 02 [Save in your Psp/Picture Frames folder], Font Type Keys, PlugIns Dsb Flux & Eye Candy 4.
1.Open any image in psp, duplicate and close the original.
2.Duplicate the background layer.
3.In the copy of background apply: Pluggins/Dsb Flux/Radial Transmission, with this settings: Radial size 1, Rotation 50, Blend 78 [feel free to play with the settings]
4.Now promote the copy of background to raster layer, go to: Layers/Promote Background Layer.
5.And change the blend mode of this layer to [Luminance (L)]
6.Now duplicate again the original layer.
7.Apply to this new copy Effects/Artistic Effects/Sepia Toning: Amount to age: 37.
8.Go to: Layers/Merge/Merge Visible.
9.Now with your Selection Tool active, Rectangle, Feather 20, draw a selection in the upper side of your image.
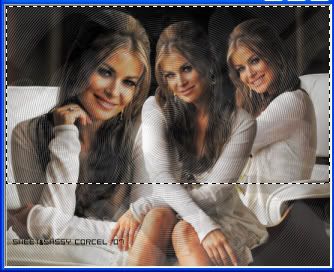 10.Go to: Edit/Cut and back to: Edit/Paste As New Image.
11.Apply Effects/3D Effects/Drop Shadow with this settings: Vert & Horiz 0, Opac 75, Blur 5, Color Black.
12.Now go to: Layers/Merge/Merge All [Flatten]
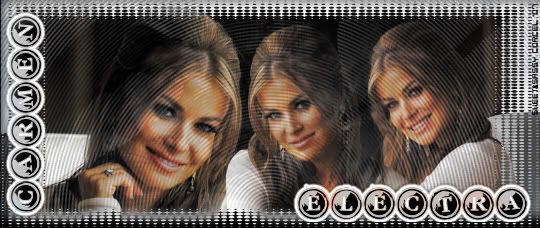
13.Go to: Image/Picture Frame and select Edge dots 02 [frame inside of the image selected]
14.Change the blend mode of the layer Picture frame to [Diference]
15.Add your watermark if you like at this point.
16.Add your text in a new layer [size 36, Foreground Color #C0C0C0, Background Color Black.
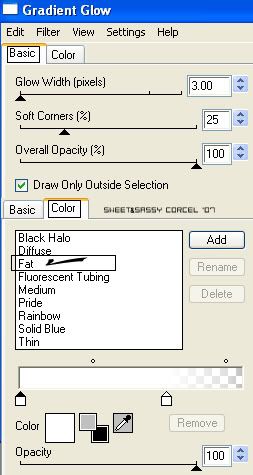
17.Apply to this text: Effects/Plugins/Eye Candy 4/Gradient Glow, with this settings:
18.Arrange the text the way you like in your image.
19.Apply the same drop shadow before [step 11]
20.Go to Selections/Select None.
21.Finally go to: Layers/Merge/Merge All [flatten]
22.Save your work and that's all!
19.Apply the same drop shadow before [step 11]
20.Go to Selections/Select None.
21.Finally go to: Layers/Merge/Merge All [flatten]
22.Save your work and that's all!
Them Done!, thanks and I hope you've enjoyed!Tutorial write on March. 15 '07 by AngieCorcelThis tutorial is my own creativity, any resemblance to any other is purely coincidentaly.
---------------------------------------------------------


