Sweet n Sassy Corcel Banner new 4-22-07

11/8/08

Spiral Rose

Spiral Rose new 4-21-07

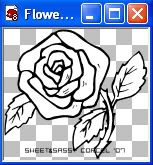
Supplies: Psp, Spiral template by me HERE, Fonts of your choice, Plugin Eye Candy 4 HERE. I will use the flower I made fallowing the Mother Day tut. You can use a tube of your choice.

1.Open a new canvas 400x400 transparent in psp.

2.Open the Spiral template [duplicate and close the original]

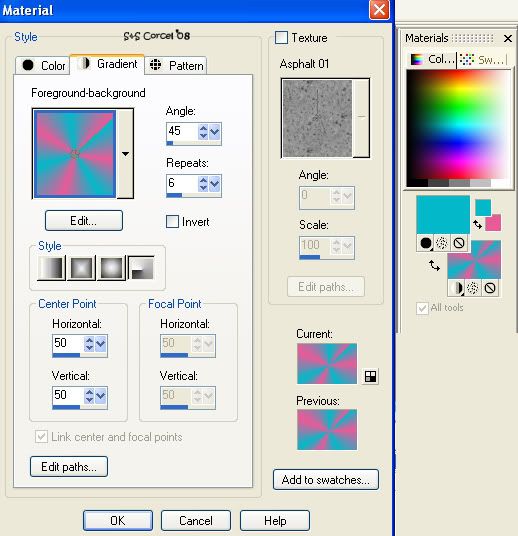
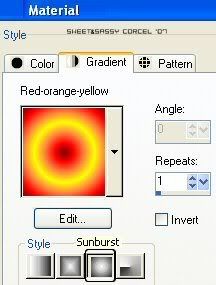
3.Active your material palette [foreground] and select a gradient of your choice with this settings:

Gradient


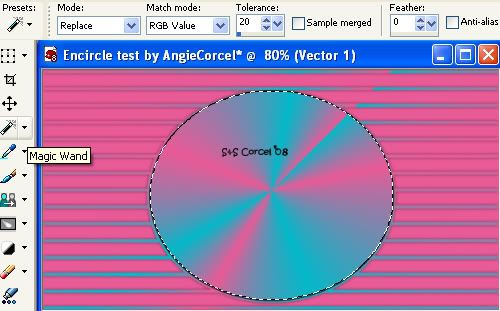
4.Now in your spiral template go to: Selections/Select all.

5.Back to: Selections/Float.

6.Fill all the selections with the gradient.

7.Deselect.

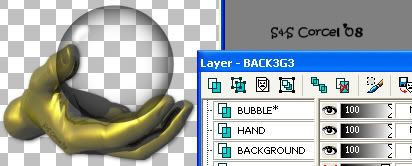
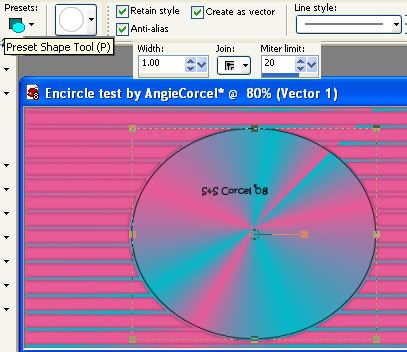
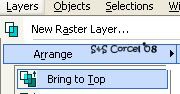
8.Copy this spiral and paste as new layer in your new canvas.

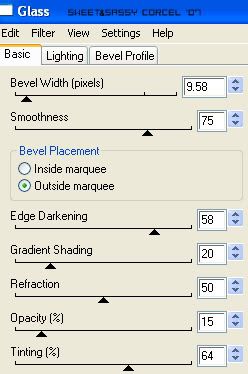
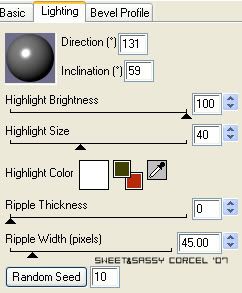
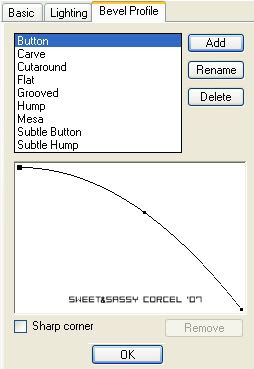
9.Now go to Effects/Plugins/Eye Candy 4/Gradient Glow with this settings:
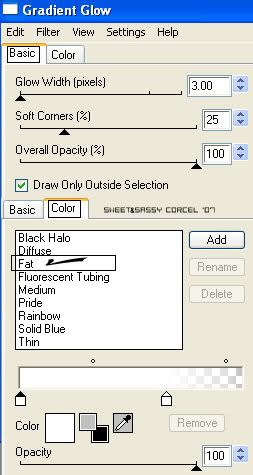
Patrics Glow white

10.Hit Ok.

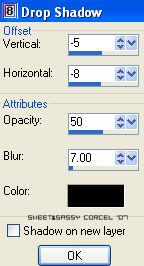
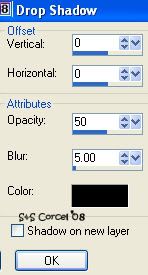
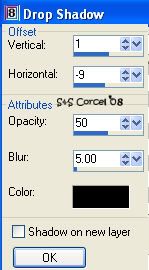
11.Now go to: Effects/3D Effects/Drop Shadow with this settings:
vert & horz 0, opc 50, blur 7, color black.

12.Copy your tube and paste as new layer in your canvas.

13.Resize as needed.

14.Move this to the left top.

15.Apply Eye Candy 4/Gradient glow with the same settings before.

16.Add a drop shadow with the same settings before.

17.I Change the blend mode of the rose tube layer to HARD LIGHT.

18.Add your text with a nice font or alpha.

19.Apply Eye Candy 4/Gradient glow with the same settings before.

20.Add a drop shadow with the same settings before.

21.Change the blend mode of the text layer to HARD LIGHT.

22.Don't forget to add your watermark and the ©Info of your image.

23.Crop the excess of your image, flatten all.

24.Save your work.

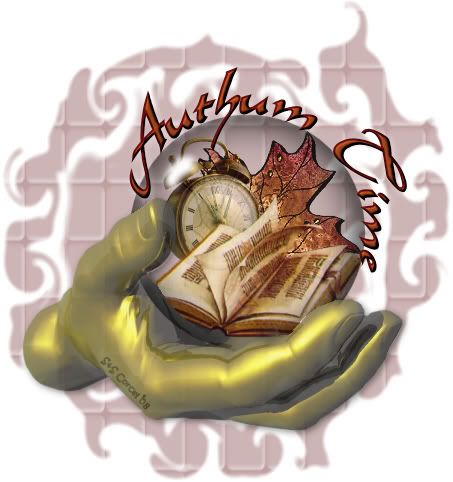
Here is another example. I use artwork from ©Anthony Aguinaldo.

Spiral Bunny new 4-21-07

Them Done!, thanks and I hope you've enjoyed! Tutorial write on April. 21 '07 by AngieCorcel. This tutorial is my own creativity, any resemblance to any other is purely coincidentaly.

-----------------------------------------------------

Bubble Hand

AUTHUMTIMEBYANGIECORCEL.jpg AUTHUM TIME BY ANGIECORCEL picture by A9C


Supplies: Psp, Hand and Bubble tube, other tube of your choice, font [I use Gelfling SF]
*I don't claim all the supplies as my owns*S&S Supplies
1.Open new canvas 600x600 in psp, transparent.
2.Open the supplies [hand/bubble]
3.Copy them and paste as new layers in your new canvas.
4.Arrange your two layers like this:

1Arrangelayers.jpg 1 Arrange layers picture by A9C

5.Step in the Bubble layer, active the eraser tool, erase the side over the fingers with this settings:

2Eraserbubble.jpg 2 Eraser bubble picture by A9C

3Eraserbubble.jpg 3 Eraser bubble picture by A9C

4Eraserbubble.jpg 4 Eraser bubble picture by A9C

6.At this point add your tubes to place them inside the bubble [reduce size if necesary] low the opacity:

5Addtubes.jpg 5 Add tubes picture by A9C

7.Add a soft shadow to your hand tube and to the other tubes you use.

8.Active the Preset Shape tool-circle and draw a vector around the bubble with this settings:

6PresetShape.jpg 6 Preset Shape picture by A9C

6DrawVector.jpg 6 Draw Vector picture by A9C

9.Active now the Text tool select a font, size and colors of your choice.

7Text.jpg 7 Text picture by A9C

10.Add Inner Bevel to your text and a soft shadow.
11.Finaly add a nice background [or use mine Back3g3] low the opacity 50%.
12.Add your watermark. Merge all the layers visibles, and crop the excess around your image, export/save as .jpg format.

GRANDMADREAMSBYANGIECORCEL.jpg GRANDMA DREAMS BY ANGIECORCEL picture by A9C

Them Done!, thanks and I hope you've enjoyed! Tutorial write on Jan. 26 '08 by AngieCorcel. This tutorial is my own creativity, any resemblance to any other is purely coincidental.
----------------------------------------------------------------------

Mother Day

Mother Day new 4-21-07

Supplies: Psp, Black & White Flower template HERE, Font of your choice, Plugin Eye Candy 4 HERE.

1.Open your flower in psp [duplicate and close original]

2.Promote the background to layer.

3.Active your magic Wand tool:

Magic Wand

4.Select the white background and hit delete in your keyboard.

Flower no background

5.Deselect.

6.Active again your magic Wand tool and select inside the leaves.

7.Fill this with a green color #0B611D.

8.Now go to: Effects/PlugIns/EyeCandy4/Glass with this settings: glass color [the same color you use for fill]

Glass1


Glass2Glass3

9.Hit ok and deselect.

10.Now select the stem of the flower, fill with color #533E15.

11.Go to: Effects/PlugIns/EyeCandy4/Glass with the same settings before [glass color the same you use for fill].

12.Hit ok and deselect.

13.Now select the petals of the flower.

14.Promote the selection to layer.

15.You can fill all the petals with the same color or using diferent shades.

16.Apply the same Eye candy 4/Glass effect to the petals [glass color the same you use for fill]

17.Merge visible all your layers.

18.Resize the flower as you like.

19.Add a shadow, go to Effects/3D Effects/Drop Shadow with this settings:

Drop Shadow

20.Add your text with a nice font.

21.Don't forget your watermark.

22.Finally Crop the excess of your image and Flatten all.

23.Save your work.

Them Done!, thanks and I hope you've enjoyed! Tutorial write on April. 21 '07 by AngieCorcel. This tutorial is my own creativity, any resemblance to any other is purely coincidentaly.

-------------------------------------------------

EnCircle

EnCirclebyAngieCorcel.jpg EnCircle by AngieCorcel picture by A9C

Supplies: Psp, WordArt made by me [or create your own] I use the Words of Wisdom for reference, EncircleMask made by me, Tube and fonts of your choice [I use TKDoodle & English111 Vivace BT], AniButterflysPink, FrameBling. [I don't claim them as my own]

S&S Supplies

1.Open new canvas 570x300 transparent in Psp.
2.Open you tube, and pick 2 colors for your background and foreground palette.
3.Fill one layer with your foreground color.
4.Now set your background to a gradient: radial style, angle 45, repeats 6.

1Gradient.jpg picture by A9C

5.Add a new layer and fill this one with your new gradient.
6.Now open the EnCircle mask in your psp, go to Layers/New Mask Layer/From Image, find in the source window "EnCircleMask", check Invert maskdata and Source luminance, OK.

2Mask.jpg picture by A9C

7.Them back to Layers/Merge/Merge group.
8.Add a soft shadow: v-h 0, opc 50, blur 5, color black.

3Shadow.jpg picture by A9C

9.Active your Preset Shape Tool, set to Ellipse, check Retain style-Antialias-Create as vector, trace a circle around the middle of the EnCircleMask.

4Shape.jpg picture by A9C

10.Now active your Magic Wand Tool: replace mode, tolerance 20, and click inside the circle vector.

5Wand.jpg picture by A9C

11.Go to Selections/Invert.
12.Copy your tube, and paste as new layer, with the Move Tool 6Move.jpg picture by A9C place the side you want to show off from your image.
13.Hit delete in your keyboard, and finally go to Selections/Deselect.
14.Low the opacity of this layer to 35% and change the blend mode to Luminance.
15.Now step in the Vector layer, hit Delete layer 7deletelayer.jpg picture by A9C in the palette.
16.Now paste your tube as new layer again, resize if needed to fit inside the canvas, move to the right.
17.Go to Layers/Arrange/Bring to Top.

8Arrange.jpg picture by A9C

18.Add a Drop Shadow to your tube, v 1, h -9, opc 50, blur 5, color black.

9Shadowtube.jpg picture by A9C

19.Repeat the shadow but invert the settings v -1, h 9.
20.Now open my wordart ["Some people are like crystal. Pretty to look at, but you can see right through them."] or use your own, copy and paste as new layer, [blend mode to Luminance (L), move this to the left of your tag.
21.Add in a new layer your nick with a nice font, don't forget to add your watermark and the info of your tube.
22.Merge Flatten all layers.
23.Go to Image/Add Borders, check Symetric, Size 1, color black.
24.Back to Image/Add Borders, change size 10, color white.
25.And repeat Image/Add Borders, size 1, color black.
26.Active your magic wand tool, and click in the white border and fill this with your gradient.
27.Go to Effects/3D Effects/Inner Bevel: round bevel, smoothness 25, depth 2, ambience 0, shininess 5, with 8, color white, angle 315, intensity 50, elevation 30.

10Innerbevel.jpg picture by A9C

28.Go to Selections/Deselect. Finished, export/save as .jpg format.
-------------------------------------------------------------------------
Animation part
EnCircleAnibyAngieCorcel.gif picture by A9C

Supplies: Animation Shop, AniButterflysPink, FrameBling. [I don't claim them as my owns]

1.Open your saved tag in you Animation Shop Program.
2.Open the "AniButterflysPink" and "FrameBling"
3.Select all the frame of each animation.
4.Now right click over your tag and hit Duplicate Selected, repeat this 5 times more to get 17 frames.
5.Step in the first frame, go to: Edit/Select all frames.
6.Active the selected frames of the Butterflys and drag them to a place you like in your tag.
7.Active the selected frames of the Bling and drag them to the bevel border of your tag.
8.To see how they look, click on the icon View Animation 11ani.jpg 11 ani picture by A9C.
9.If you like it, save as .gif format.

Them Done!, thanks and I hope you've enjoyed! Tutorial write on February. 13 '08 by AngieCorcel. This tutorial is my own creativity, any resemblance to any other is purely coincidentaly.
------------------------------------------------------------------------

Scraps Created by Me [AngieCorcel]


Photo Sharing and Video Hosting at Photobucket


Click on Previews to Download. Terms of Use.


BubbleGum Alpha Preview by AngieCorcel Denim Alpha Preview by AngieCorcel RedBlue Ribbons Preview by AngieCorcel


Pinked ScrapKit Preview by AngieCorcel Film Strips Preview by AngieCorcel


Tassels Preview by AngieCorcel Stitches Preview by AngieCorcel LinedCrunge Mini Scrapkit Preview by Corcel


Denim ScrapKit Preview by AngieCorcel DollPinguinCat Preview by AngieCorcel WoodAlphaPreviewbyAngieCorcel.jpg WoodAlphaPreview by AngieCorcel picture by A9C


Frames Preview by AngieCorcel Bee and Honeycomb Preview by AngieCorcel Buttons Preview by AngieCorcel


Sheeps Preview by AngieCorcel Cows Preview by AngieCorcel Pigs Preview by AngieCorcel


SwingButtonsPreviewbyAngieCorcel08.jpg Swing Buttons Preview by AngieCorcel 08 picture by A9C Tapes Preview by AngieCorcel FramesPreviewbyAngieCorcel-1.jpg 3Frames Preview by AngieCorcel picture by A9C


Pastel Bows by AngieCorcel Pastel'n'Camouflage Ribbons by AngieCorcel Bee Happy ScrapKit Preview by AngieCorcel


Creme MiniScrapKit Preview by AngieCorcel

-----------------------------------------------------------------------------

Sweet lambs
Sweet n Sassy Corcel Banner 1 new 4-22-07