

Supplies: Psp, WordArt made by me [or create your own] I use the Words of Wisdom for reference, EncircleMask made by me, Tube and fonts of your choice [I use TKDoodle & English111 Vivace BT], AniButterflysPink, FrameBling. [I don't claim them as my own]
1.Open new canvas 570x300 transparent in Psp.
2.Open you tube, and pick 2 colors for your background and foreground palette.
3.Fill one layer with your foreground color.
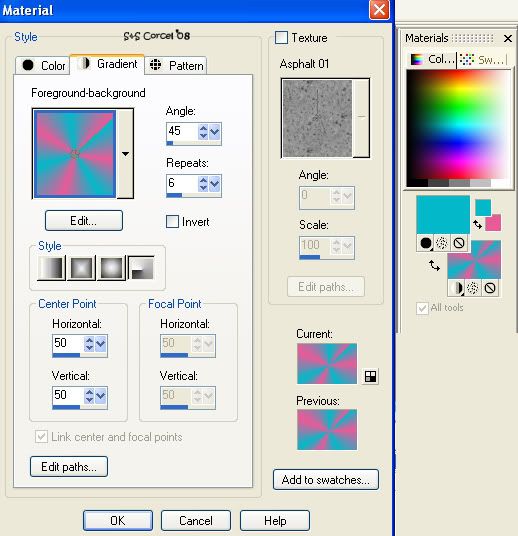
4.Now set your background to a gradient: radial style, angle 45, repeats 6.
5.Add a new layer and fill this one with your new gradient.
6.Now open the EnCircle mask in your psp, go to Layers/New Mask Layer/From Image, find in the source window "EnCircleMask", check Invert maskdata and Source luminance, OK.

7.Them back to Layers/Merge/Merge group.
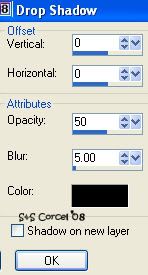
8.Add a soft shadow: v-h 0, opc 50, blur 5, color black.
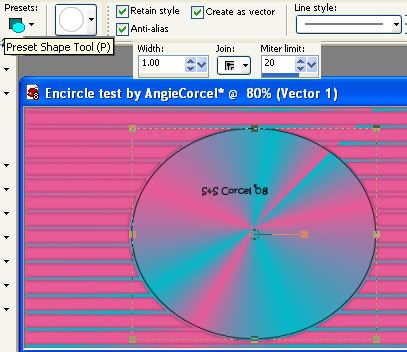
9.Active your Preset Shape Tool, set to Ellipse, check Retain style-Antialias-Create as vector, trace a circle around the middle of the EnCircleMask.
10.Now active your Magic Wand Tool: replace mode, tolerance 20, and click inside the circle vector.
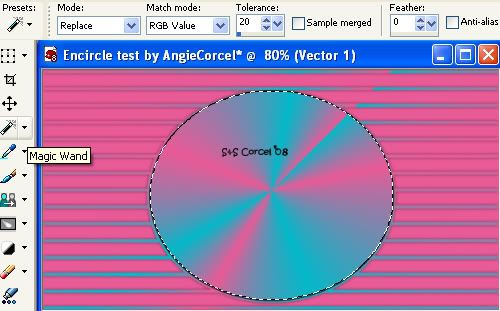
11.Go to Selections/Invert.
12.Copy your tube, and paste as new layer, with the Move Tool  place the side you want to show off from your image.
13.Hit delete in your keyboard, and finally go to Selections/Deselect.
14.Low the opacity of this layer to 35% and change the blend mode to Luminance.
15.Now step in the Vector layer, hit Delete layer  in the palette.
16.Now paste your tube as new layer again, resize if needed to fit inside the canvas, move to the right.
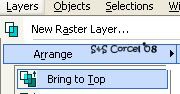
17.Go to Layers/Arrange/Bring to Top.
18.Add a Drop Shadow to your tube, v 1, h -9, opc 50, blur 5, color black.
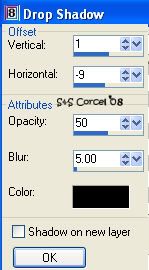
19.Repeat the shadow but invert the settings v -1, h 9.
20.Now open my wordart ["Some people are like crystal. Pretty to look at, but you can see right through them."] or use your own, copy and paste as new layer, [blend mode to Luminance (L), move this to the left of your tag.
21.Add in a new layer your nick with a nice font, don't forget to add your watermark and the info of your tube.
22.Merge Flatten all layers.
23.Go to Image/Add Borders, check Symetric, Size 1, color black.
24.Back to Image/Add Borders, change size 10, color white.
25.And repeat Image/Add Borders, size 1, color black.
26.Active your magic wand tool, and click in the white border and fill this with your gradient.
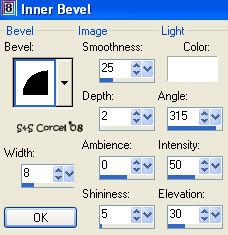
27.Go to Effects/3D Effects/Inner Bevel: round bevel, smoothness 25, depth 2, ambience 0, shininess 5, with 8, color white, angle 315, intensity 50, elevation 30.
28.Go to Selections/Deselect. Finished, export/save as .jpg format.
-------------------------------------------------------------------------
Animation part

1.Open your saved tag in you Animation Shop Program.
2.Open the "AniButterflysPink" and "FrameBling"
3.Select all the frame of each animation.
4.Now right click over your tag and hit Duplicate Selected, repeat this 5 times more to get 17 frames.
5.Step in the first frame, go to: Edit/Select all frames.
6.Active the selected frames of the Butterflys and drag them to a place you like in your tag.
7.Active the selected frames of the Bling and drag them to the bevel border of your tag.
8.To see how they look, click on the icon View Animation
9.If you like it, save as .gif format.
Them Done!, thanks and I hope you've enjoyed! Tutorial write on February. 13 '08 by AngieCorcel. This tutorial is my own creativity, any resemblance to any other is purely coincidentaly.
------------------------------------------------------------------------


