
Supplies: Psp, Fonts of your choice, Eyelets HERE, Ribbons ScrapKit by me HERE, PlugIn Eye Candy 4 HERE, Images Blend Kelly Clarkson 1-2.
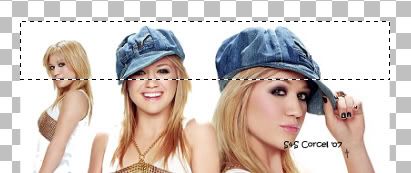
1.Open the image blend of your choice [duplicate and close original]
2.Promote background to layer.
3.Go to: Image/canvas size and expand your canvas 600x600 center.
4.Active your selection tool: Rectangle/Replace mode/Feather 0/check Antialias:
![]()
5.Draw a rectangle selection in the top of your image and click in the middle of your selection:
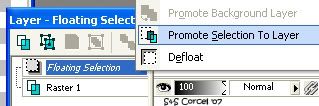
6.Now in your layer pallete, right click/promote selection to layer:
7.Deslect.
8.Step back in your image layer and repeat this steps.
9.When you finish to separate all the image in rectangles, rotate the layer and place them overlap in the corners.
10.Apply to all the rectangle layers the plugin Eye Candy/Gradient Glow/Color Fat and pic a dark color from your image, settings like this:

11.Hit Ok.
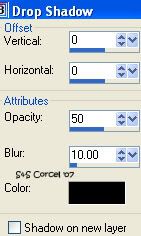
12.Then add a Drop Shadow to the layers: vert-horz 0, opc 50, blur 10, color black:
13.When your are satisfied, go to layers merge visible.
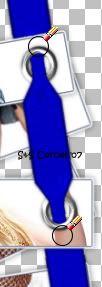
14.Now open the Eyelets element and copy/paste as new layer and place then in the corners of your image like this:
15.Active your Magic Wand tool, and click inside of the eyelets.
16.Now step in the image layer hit delete in your keyboard.
17.Open the Ribbons and copy one, then paste as new layer in your image.
18.Active the Deform tool 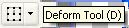 and rotate the ribbon, place this parallel down the eyelets.

19.Active the Warp Brush tool with this settings:

20.Place your tool in the middle of your eyelet [but step in the ribbon layer].
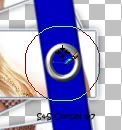
21.Press the left bottom of your mouse 2-3 times untill you get something like this:
22.Now add shadow to your ribbon and move the layer to the top layers,
duplicate the ribbon layer, send the copy layer to the bottom layers.
23.Step back in the first ribbon layer [on top]
24.Active the Eraser tool, settings like this:
![]()
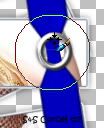
25.Erase the ribbon around your eyelet [to hide this back the rectangles]
26.Finally decorate your image with another elements.
27.Add your nick and the artist name with a nice font, apply this the same plugin effect before, and the shadow.
28.Merge layers visibles, crop the excess of your image.
29.Add your watermark, flatten all and save your work.
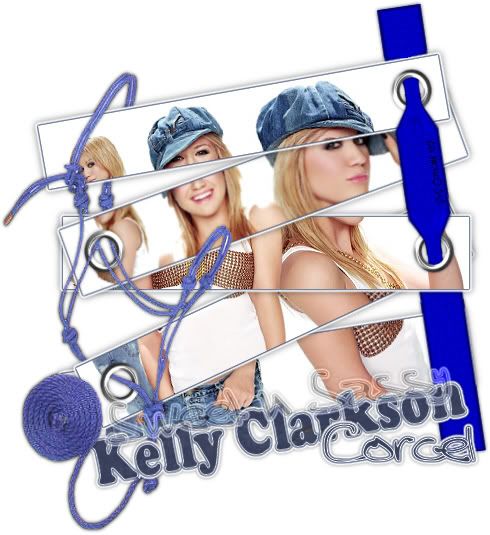
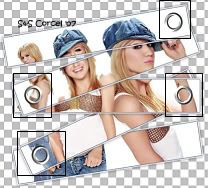
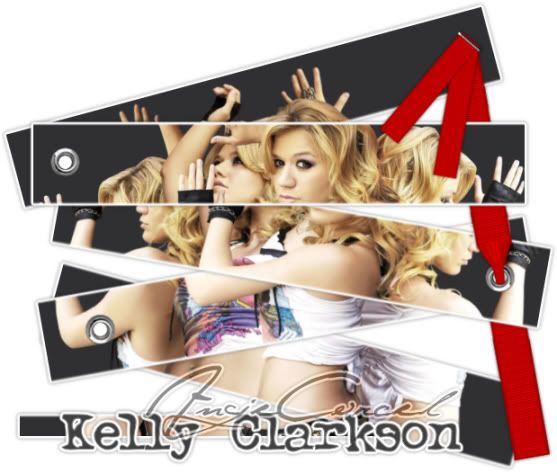
Here is another example:
Them Done!, thanks and I hope you've enjoyed! Tutorial write on May. 06 '07 by AngieCorcel. This tutorial is my own creativity, any resemblance to any other is purely coincidentaly.
----------------------------------------------------------------------------


