
3.Step in the photo image, duplicate the layer.
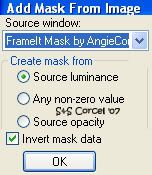
4.Apply the mask to this copy layer:
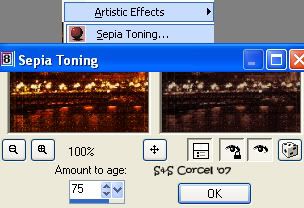
6.Apply to this group layer: Effects/Artistic Effects/Sepia Toning/75:
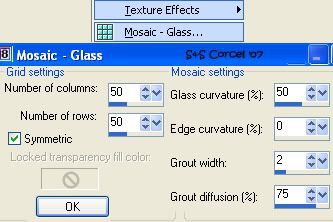
8.Now go to: Effects/Texture Effects/Mosaic Glass:
10.Go to: Edit/Copy.
11.Now duplicate the Frame it mask, promote background to layer.
12.Active the Magic Wand and select the white strips between the black rectangles, hit delete in your keyboard.
15.Deselect.
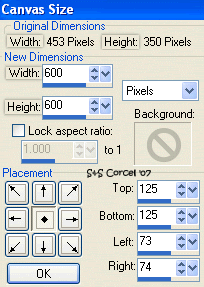
16.Expand your canvas, go to: Image/Canvas Size/600x600/center:
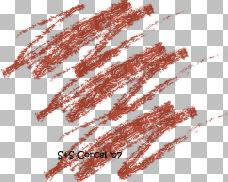
19.In this layer add the brush like 3 times [of your choice] with a color from the photo:
![]()
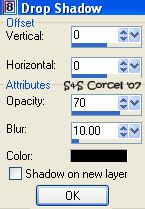
21.Open the ribbon [copy and paste as new layer] add shadow.
22.Move the ribbon to the top of hangers.
23.Active the Eraser tool and erase a little part, to hide the ribbon back the hangers:

25.Arrange this layer back to the ribbon and hangers.
26.Open the tag s224t4 [copy and paste as new layer on top] add shadow.
27.Add a new layer and type your name with the font, change the blend mode to this layer to Soft Light.
28.Add your watermark and merge layers visibles.
29.Crop the excess of your image, flatten all, save your work.
Them Done!, thanks and I hope you've enjoyed! Tutorial write on May, 17 '07 by AngieCorcel. This tutorial is my own creativity, any resemblance to any other is purely coincidentaly.
------------------------------------------------------------------


